Invoice Generator
How to Create an Invoice With the Invoice Generator
With our invoice generator, you can easily create professional invoices in minutes, with a personalized logo and all the information you and your clients need for smooth transactions.
Here is a detailed guide on how to create an invoice in easy-to-follow steps:
Step 1: Fill in the “From” Section With Your Company Details

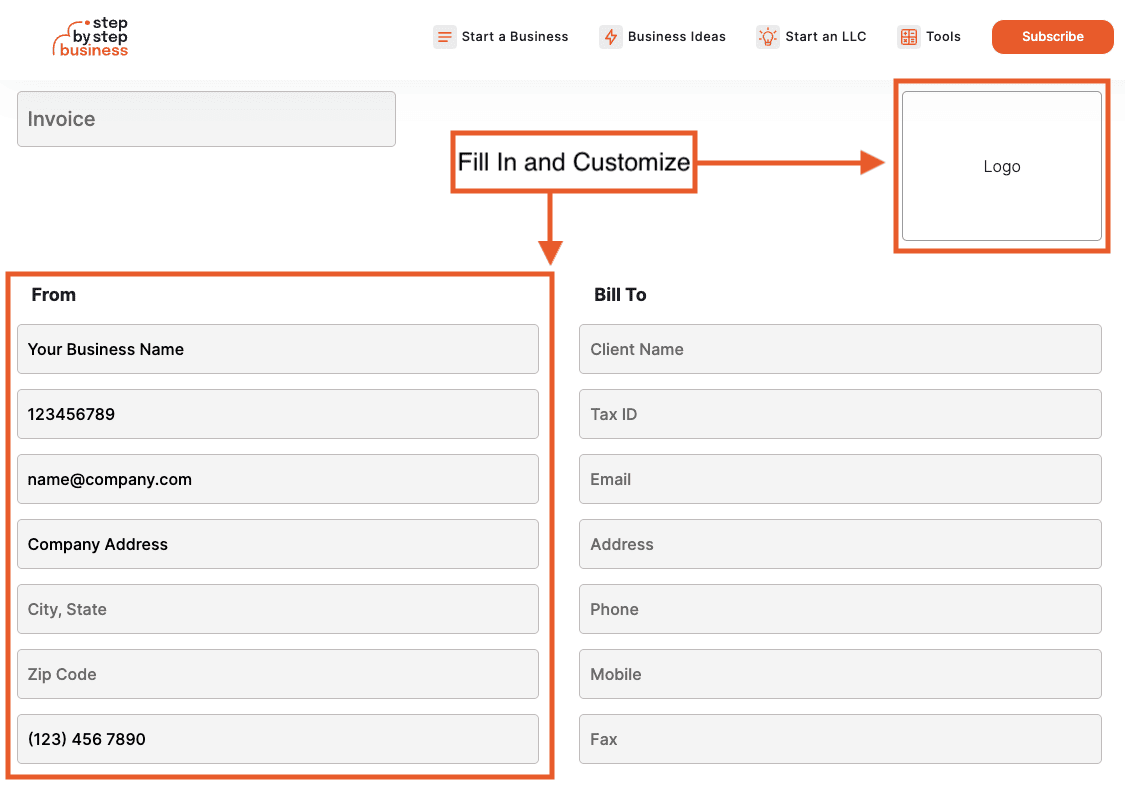
- Start by using the predefined fields to add your business name, tax ID, email, address, and phone number
- Make sure you are adding the correct tax information. Depending on your company structure, this number will be different
- Once you start typing in the company address field City, State and Zip Code will automatically pop up
- Add your company logo in the upper right corner to customize the invoice
Step 2: Add Your Client’s Details in the “Bill To” Section

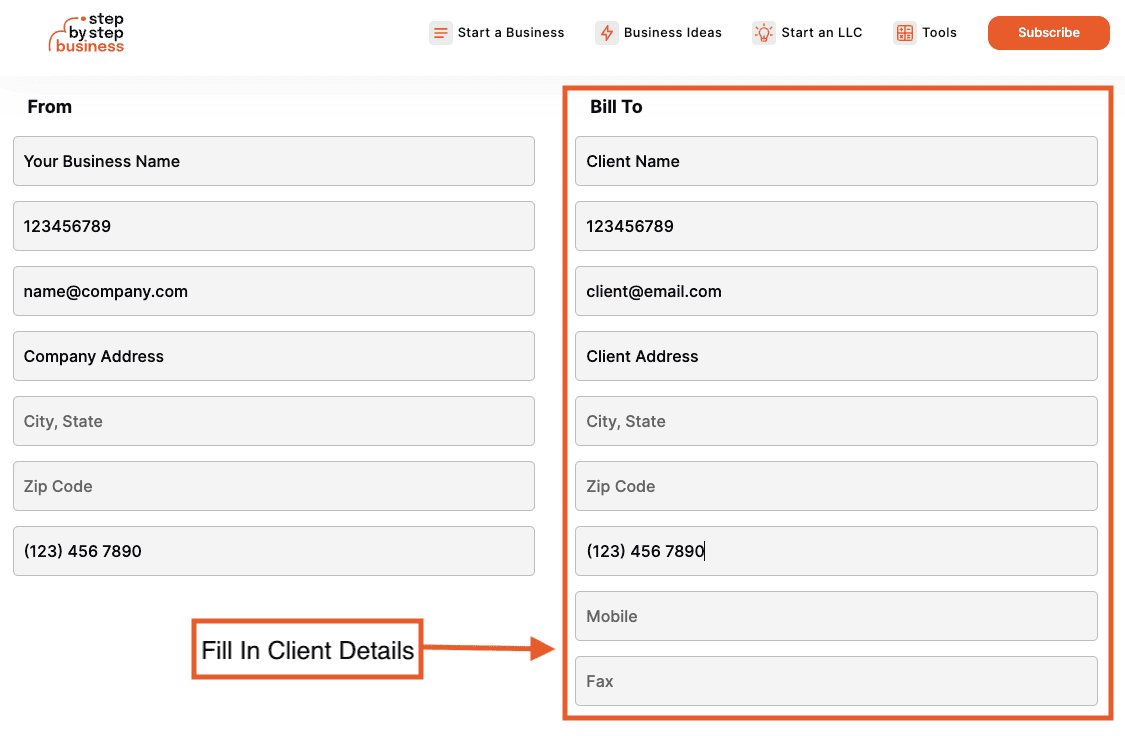
- Use the predefined fields in our invoice generator to add all the relevant information for your client including company name, tax ID, email, address, and phone number(s)
- Make sure the tax ID is valid
Step 3: Fill in the Date and Number Details


- Create your unique invoice number using a combination of letters and numbers
- Add the issue date
- Customize the invoice due date (optional), and the generator will automatically create the due date below
Step 4: Add Items

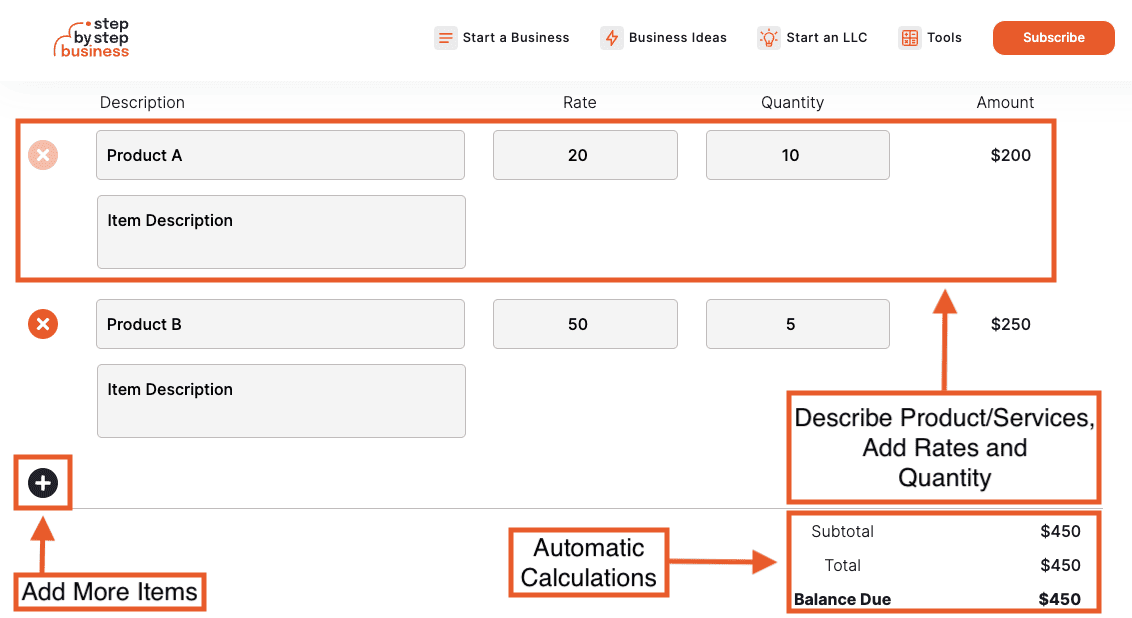
- Describe your product or service, add the rate and quantity, and the invoice generator will do all the calculations automatically for you
- If you want to add more items, simply click on the “+” icon in the lower left corner
- All automatic calculations will appear in the right corner, making it easy for you to see the subtotal and total
Step 5: Write Any Additional Notes

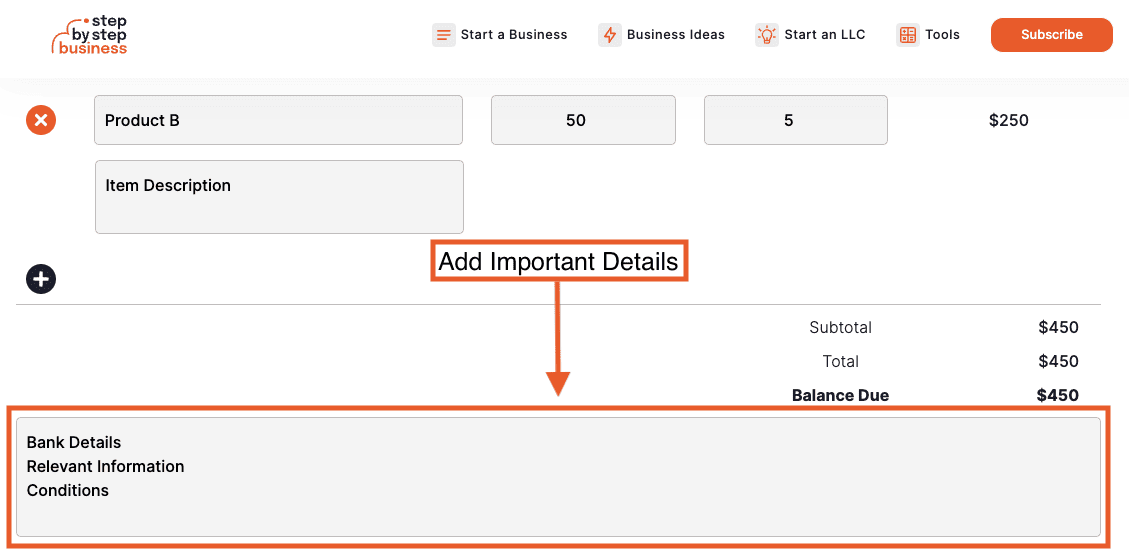
- If any relevant information is not covered in the previous fields of the invoice, you can add it here (bank details, conditions, or any other information)
Step 6: Apply Taxes

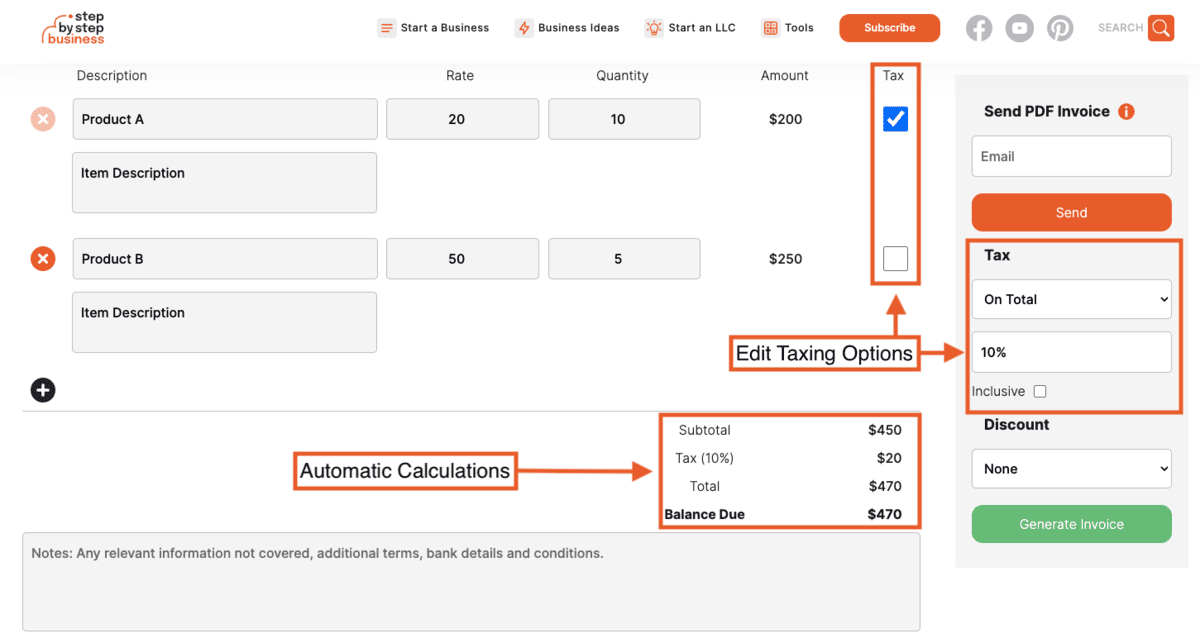
- Choose the right taxing option (None/On Total/Deducted), and the tax will automatically appear in your invoice
- Select the percent (%) of your taxes and if it’s inclusive or not
- Select items on your list that you want to calculate the tax on
- Review all the automatic calculations at the bottom of your invoice
Step 7: Add Discounts

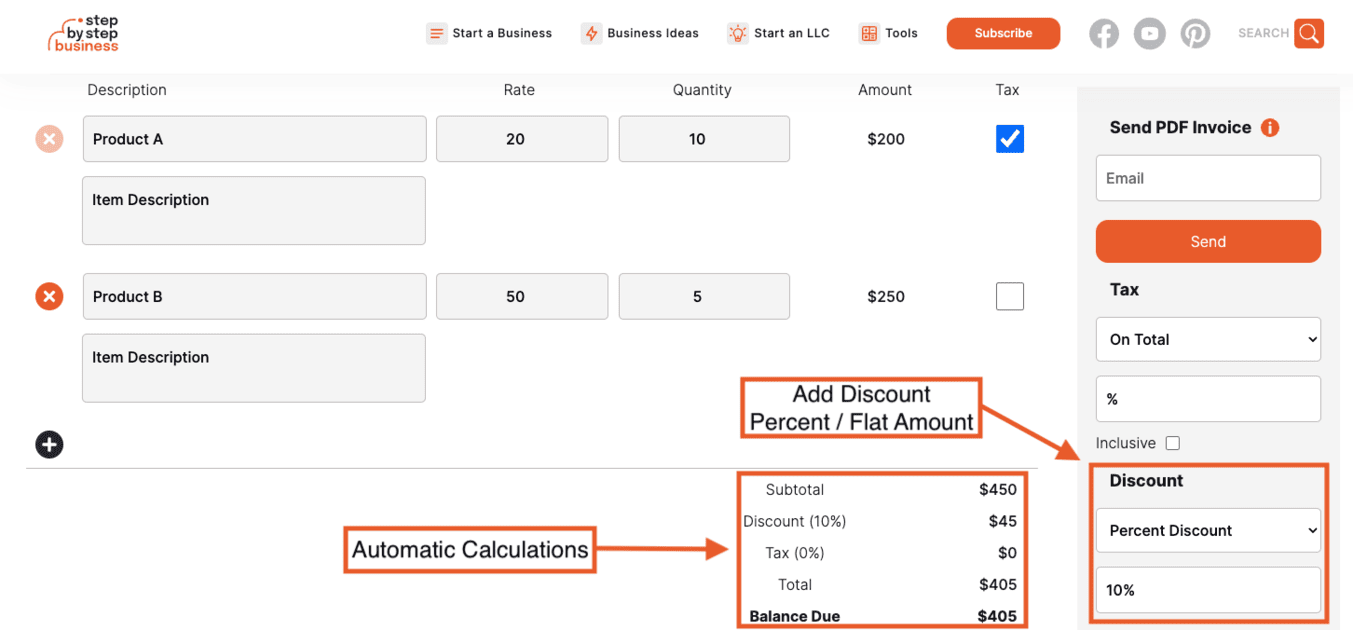
- You can add your discount in pre-designed fields
- Choose between percent of flat amount discount
- Review the automatic calculations at the bottom of your invoice
Step 8: Sign Your Invoice

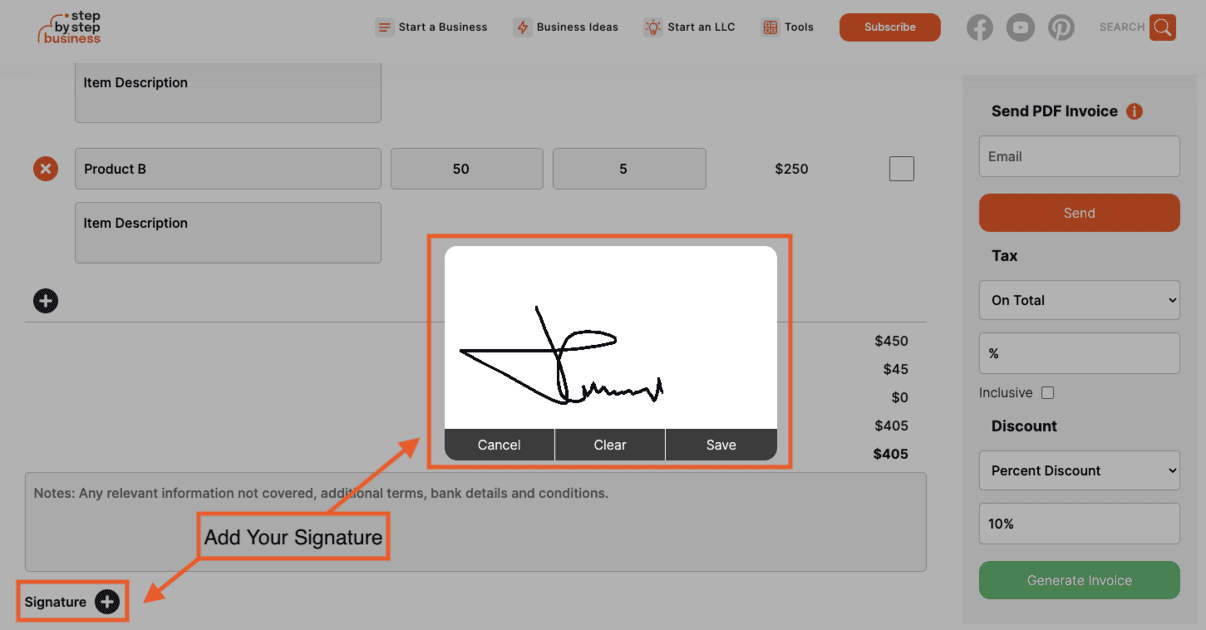
- Click on the “+” icon next to the Signature to add your handwritten signature
- Fill in the white box, or use commands to chancel, clear, and save the signature
Step 9: Preview Your Invoice

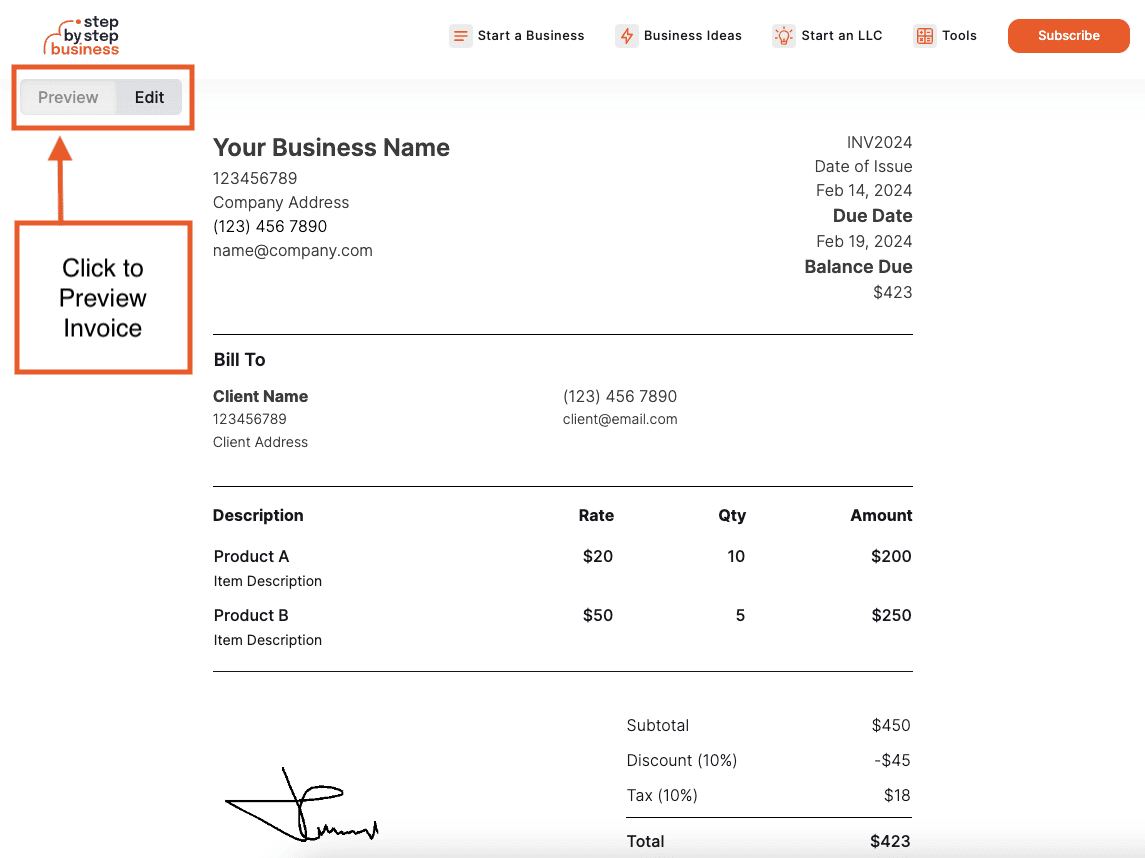
- In the top left corner, you will see options to preview or edit your invoice
- Click on the “Preview” to see the PDF version of your invoice
- Click on “Edit” if you want to change anything
How to Send an Invoice With the Invoice Generator
Now that you have a professional and customized invoice, you can send it to your clients. There are two ways to send the invoice with our generator:
Send Directly to Your Client’s Email

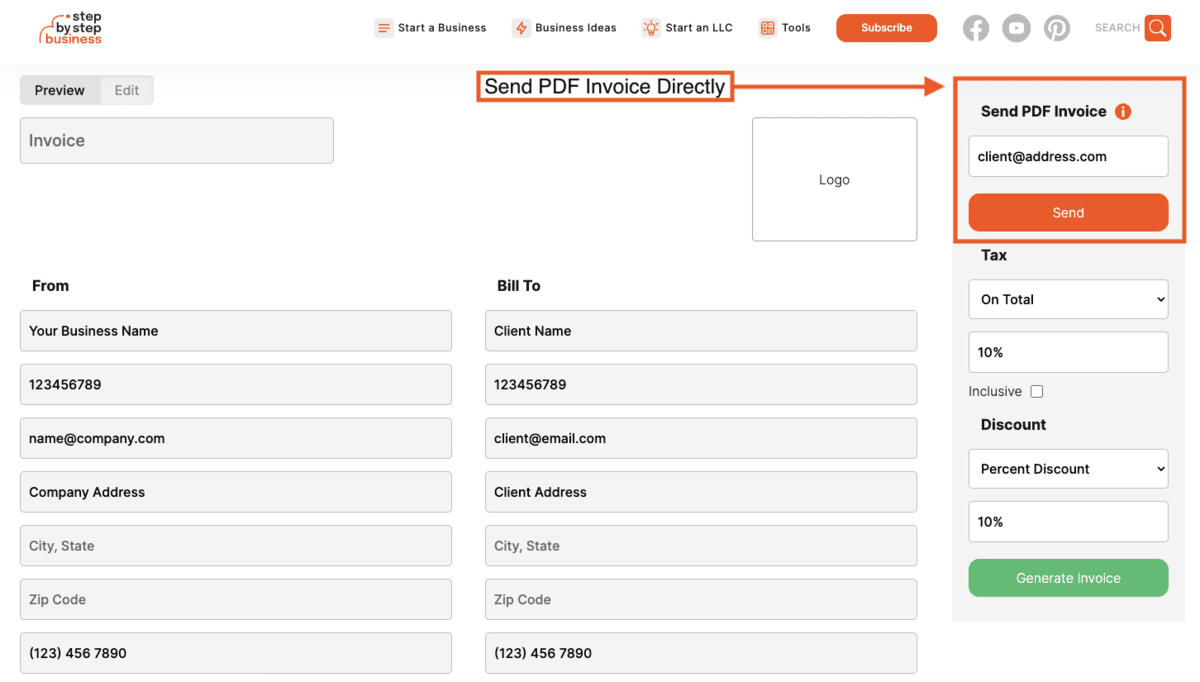
- If you want to send the invoice from our generator directly to your client, all you have to do is add a valid email address in the top right corner and click “Send”
Generate Invoice and Download PDF

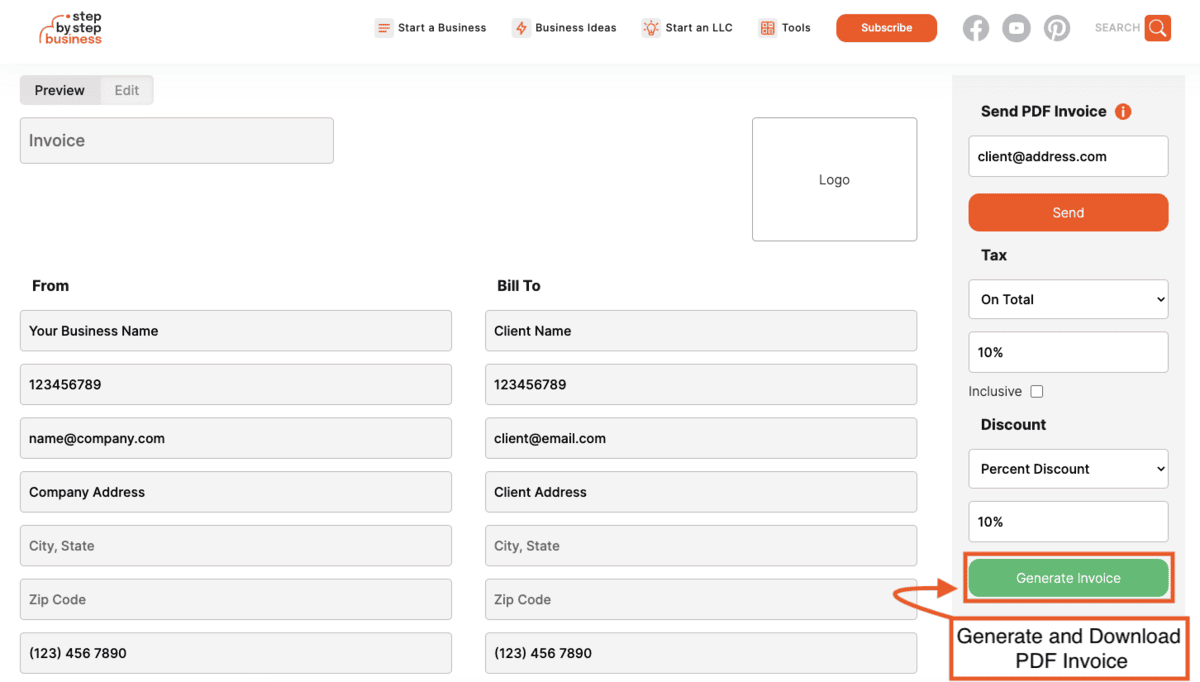
You can click the “Generate Invoice” button to take you to another page where you can preview and download your invoice.
Thank you for subscribing! We can't wait to share our latest news and updates with you. Get ready for exciting content in your inbox.
No thanks, I don't want to stay up to date on industry trends and news.